Friday 23 November 2012

Christmas Green Glitter and Snowflakes!

Hey guys,

I came up with this manicure when I saw this picture. It's Sinful Colors Call You Later sponged onto the tips of the nails and a few dots of Milani Gold on top. Finally I stamped different snowflakes from HB plate 23 in white.


 Loves it!

Monday 12 March 2012

Purple Leopard

Absolutely LOVE this look. Its so sparkly and girly, it just looks.. expensive ya know? Like you paid a lot for it :3

So it's a base of OPI Panda-monium Pink, a slightly lilac-y pink which looks goooorgeous with the purple. Stamped with BM 221, dotted with GOSH Wild Lilac (or try OPI Planks A Lot) and then dotted with China Glaze Fairy Dust on top of the purple.

First picture is the most color accurate. Sorry for the little drags, I was getting impatient.


I'm back baby!

Tuesday 13 December 2011

Pink Christmas Snowflake Nails

 Hi there,

This is a snowflake nail I created by sponging a dark pink, white, and China Glaze Frosty over the nail, then stamping a metallic pink snowflake over the white parts and a white snowflake over the pink parts. I used the HB plate HB23 for the tiny snowflakes, it looks like this:


 You can find these plates at bf-beauty.com. I really like the plates and they stamp pretty well, but be warned that the images are not Konad/BM size, they are significantly smaller. Compared to the BM14 snowflake, they are about a quarter of the size. However I really like this size as my nails are short and small.


I added beads to the left hand but the paint started to melt in the nail polish and bled into the rest of the nail polish! It kind of ruined it so I left them off the right hand but if you had better quality nail beads it looks nice.


Tuesday 25 October 2011

Halloween Nail Series Part 3 - Cartoon Nail Art!

Hello! This is a very cartoon-y set of nail skittles. I got some inspiration from this post by AskMeWhats.


The green on the index finger is Who The Shrek Are You from OPI, the blue on the middle finger is Orly's Bombay Star, ring finger was OPI Flit a Bit, China Glaze Lemon Fizz for the yellow, and pinky was the Wet n' Wild halloween series polish Cougar Attack. The black and white was just generic, and the lines were freehanded and the circles were all dotted!


Kinda silly but cute!

Sunday 9 October 2011

Halloween Nail Series Part 2 - Accent Thumbs!

Hello! I did a few halloween manicures that were a bit more toned down with just one halloween nail per hand. I decided to switch it up and do the accent nail on the thumb, also known as the "blackberry manicure", because when you text your two thumbs are showing!

The first is a Frankenstein nail, with a base of OPI's Who The Shrek Are You? with Wet 'n Wild Tangled In My Web on top.


The next is a Pumpkin thumb with OPI's Extra-Va-Va-Ganza on the thumb and Orly's Star of Bombay on the rest of the fingers.


The last one is a witch nail, with Orly's Star of Bombay, China Glaze Lemon Fizz for the moon, and stamped in black with BM13. The rest of the nails are OPI Flit a Bit and Wet n' Wild Tangled in my web.


And there ya go! A few ideas to get you going.

Thursday 6 October 2011

Halloween Nail Series Part 1 - Spiders in Webs with BM13

Hellooooooo!

This is the first of my Halloween-themed nails, and I absolutely love it. It's really pretty and wearable, and I got lots of compliments on it. So here it is, it's China Glaze Snow as a white base, stamped with OPI's Lucerne-tainly Look Marvellous and BM13 spider web, and stamped with Konad black with the BM13 spider, and a red dot on its back. I would also recommend trying this with a glow in the dark coat over the white and a black spider and spider web. That way in the dark both will show up.

Now this one was a nightmare to capture. It was so hard to get the silver to show up on camera and the red to show up at the same time. In real life the spider webs are easy to see, a super glittery sparkly charcoal spider web, and the red on the spiders is easy to see too.

And AAARRGG every time I photograph my nails there's one flippin hair coming off my nails that I never see until it's too late, so I apologize for that annoying hair.


From the flash you can see the red on the spiders better. In real life it looks like above but with the red showing like below.


I also did this look with China Glaze Snow as a white base, China Glaze White Cap over it, Sally Hansen Chrome Blue for the BM13 spider web, and a Konad Black spider with 2 black rhinestones to make the spider 3D. This one was my original idea but it turned out a bit sloppy. I think it would be a good look if I had been a bit more patient.


There ya go! Stay tuned for more in the series!

Tuesday 4 October 2011

Hearts with Scrapbook Transfers

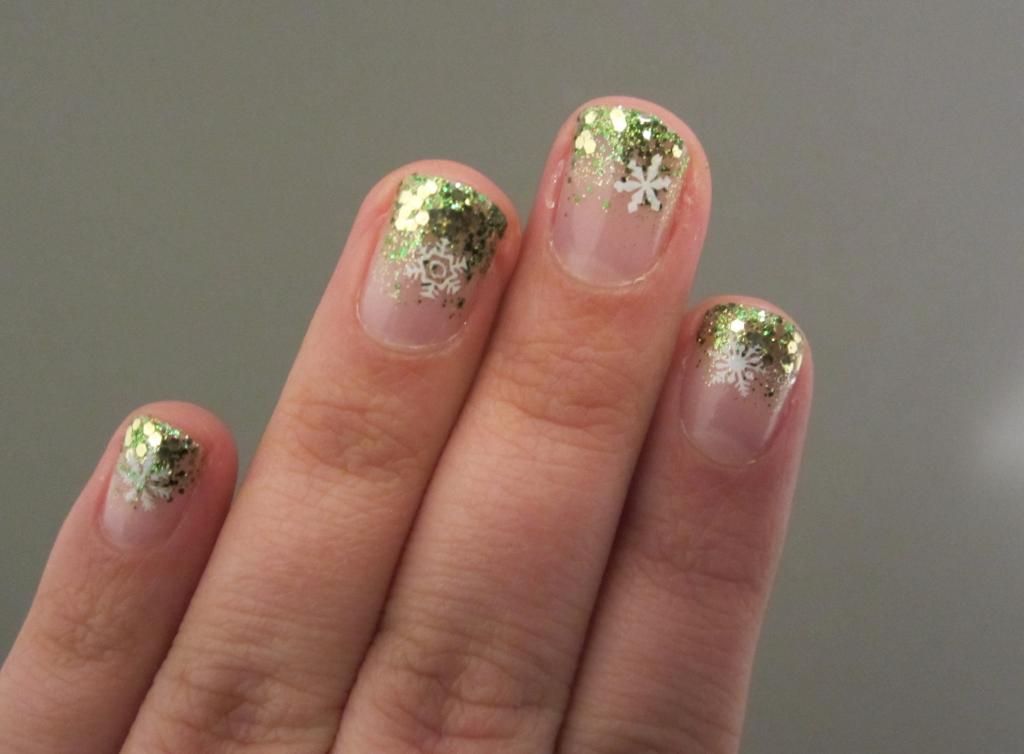
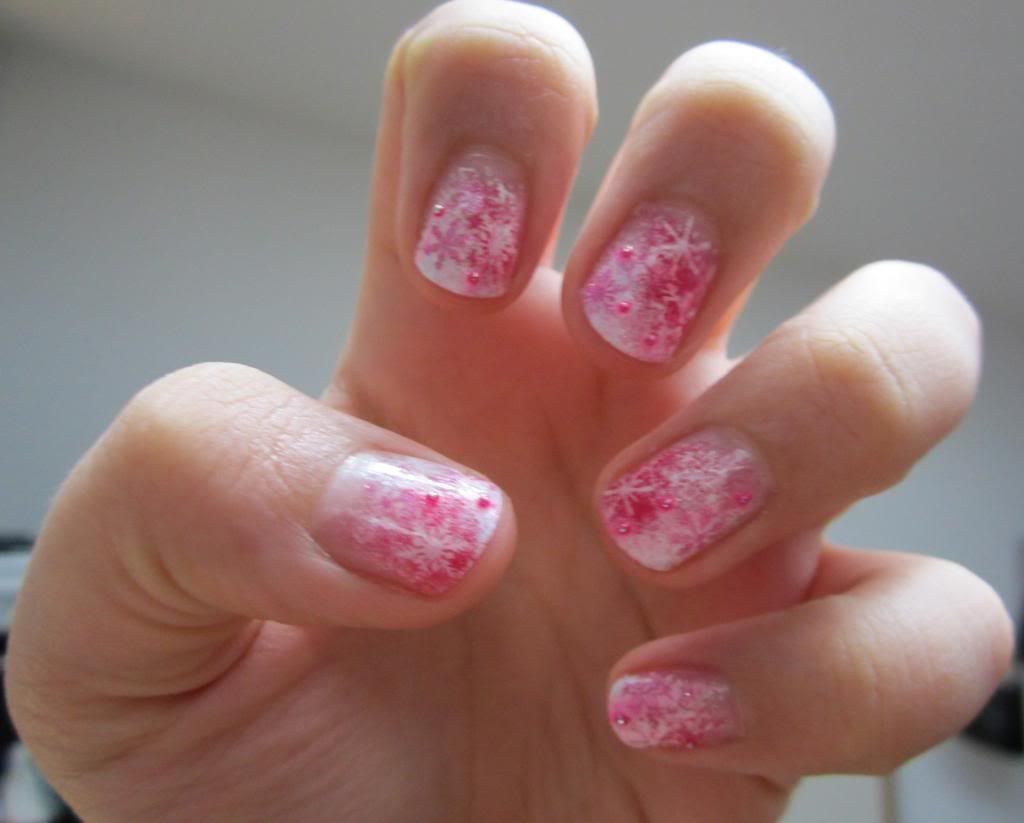
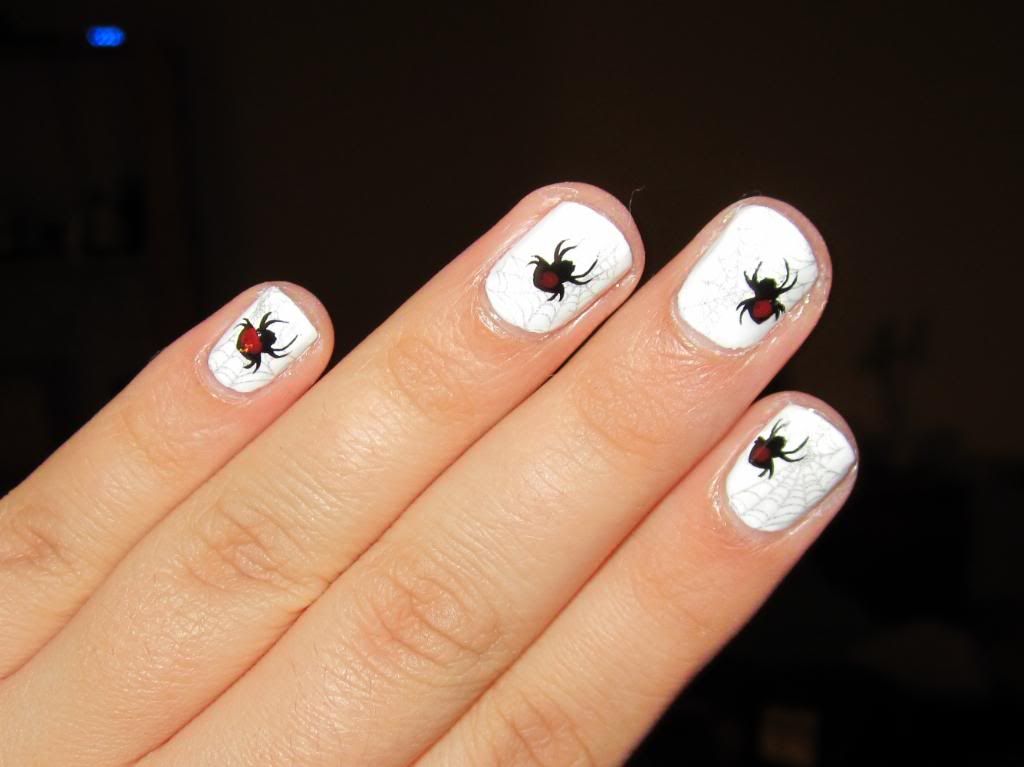
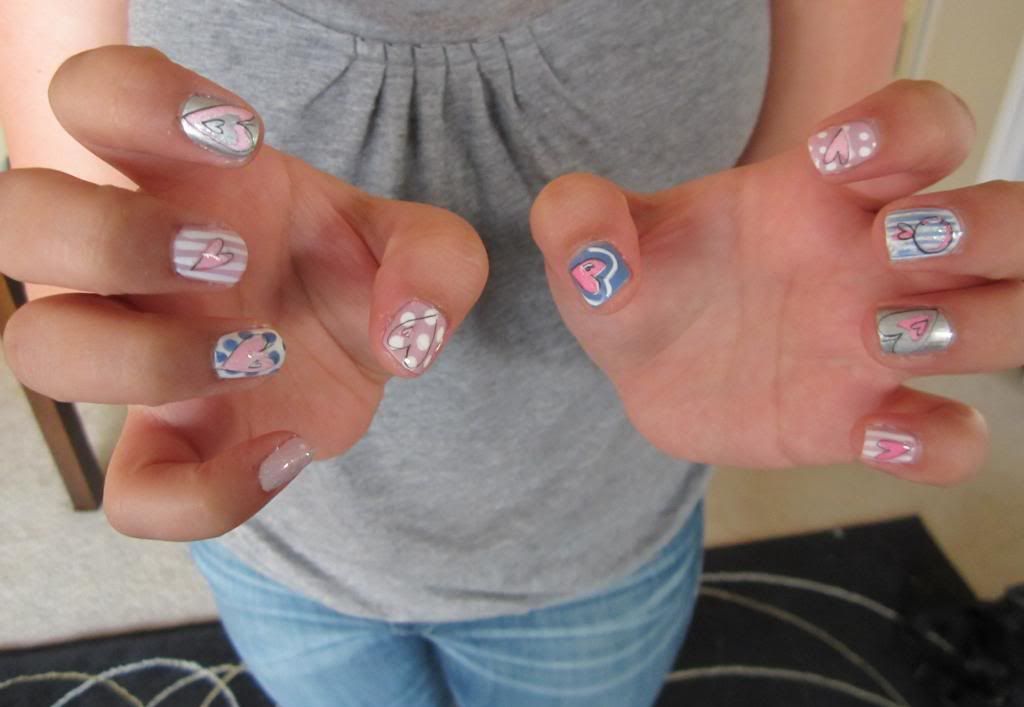
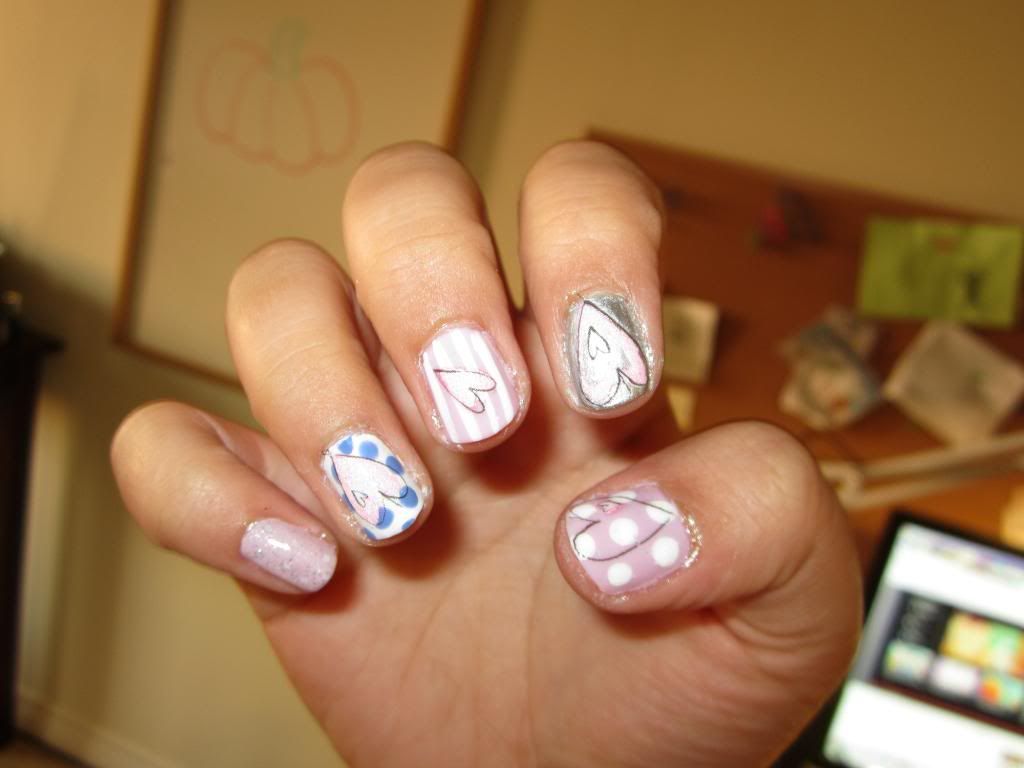
So this is the look I came up with for the scrapbook transfers. I actually have kind of a funny story - I saw this post by geezleweez where she talks about using scrapbook transfers on the nail, and I was like that is such a good idea, I should see what kind of scrapbook transfers I can find around here and see what I can do with them. So I went to Dollarama and I found these transfers, and was so excited and did this nail look with them which I absolutely loved and got so many compliments on. Then I remembered where I got the idea from and went back to her post, and it turns out I picked up the EXACT same decals as her just totally by accident!

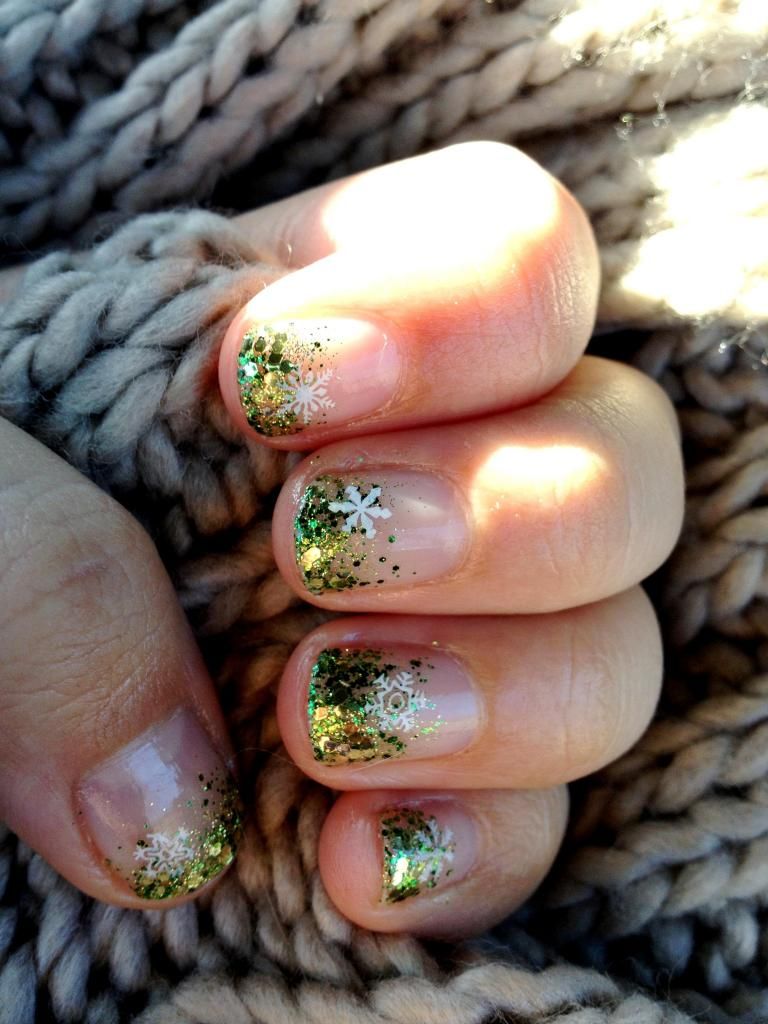
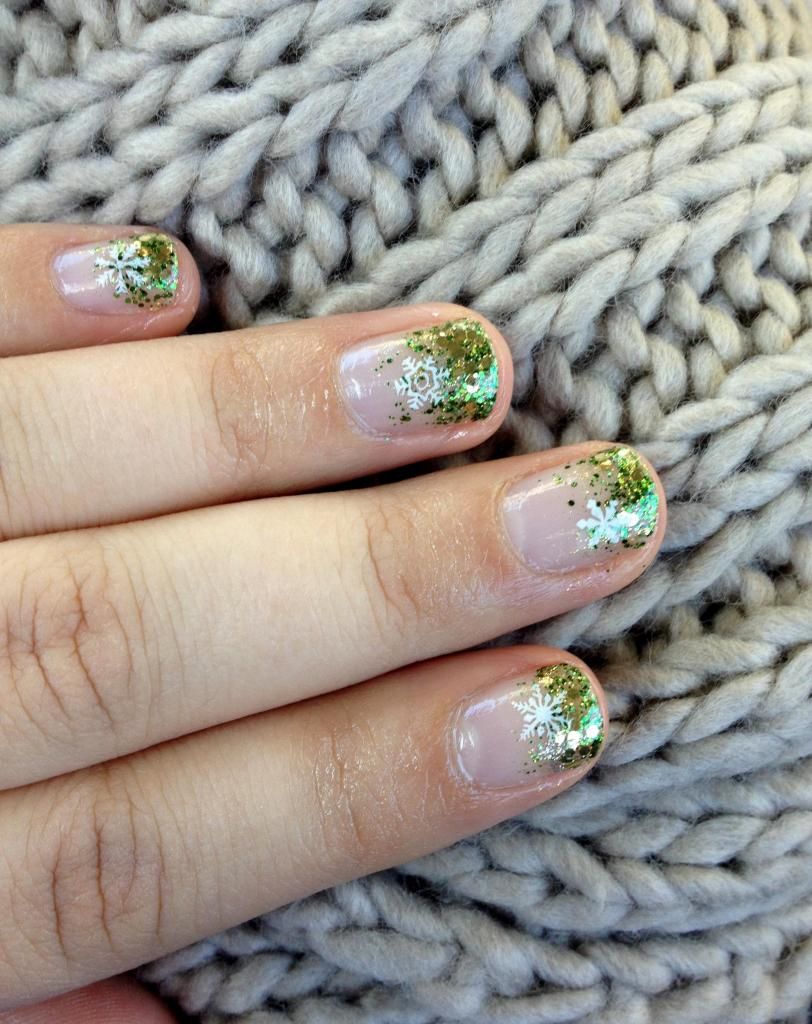
Anyhow, if you can get your hands on any scrapbook transfers, let me tell you, they work wonderfully and look so great! This is definitely my new favorite way to do nails. Transfers are like clear backed very thin stickers. I haven't looked in Michael's yet but I'd imagine they have some great transfers.

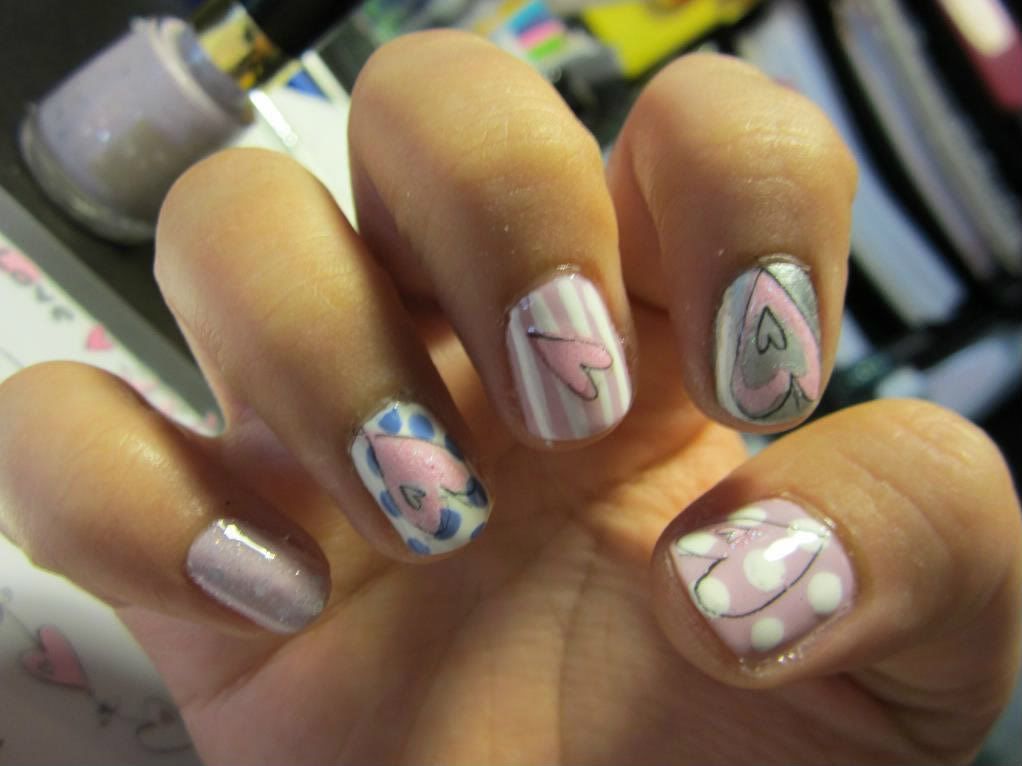
One tip however, definitely make sure your nails are very very dry before you attempt to put a transfer on. Because you have to press fairly hard and sort of roll them onto your round nail, it will definitely smudge anything that is not completely dry.

Sorry for the slightly bad cleanup and dry fingers, I was just so excited to share this with the world that I wasn't being that vigilant ahah!


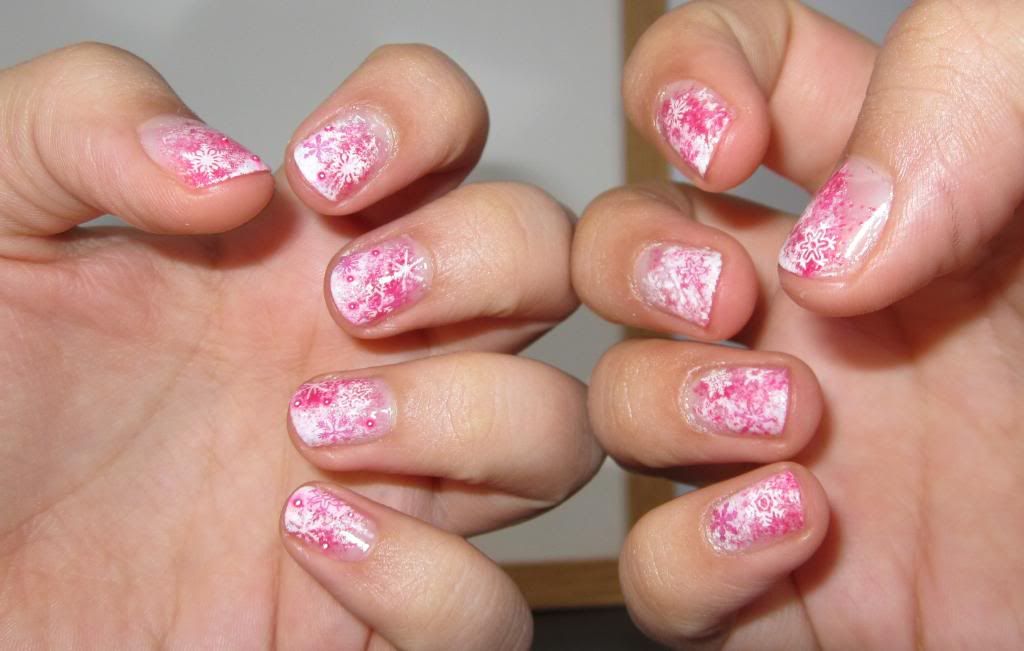
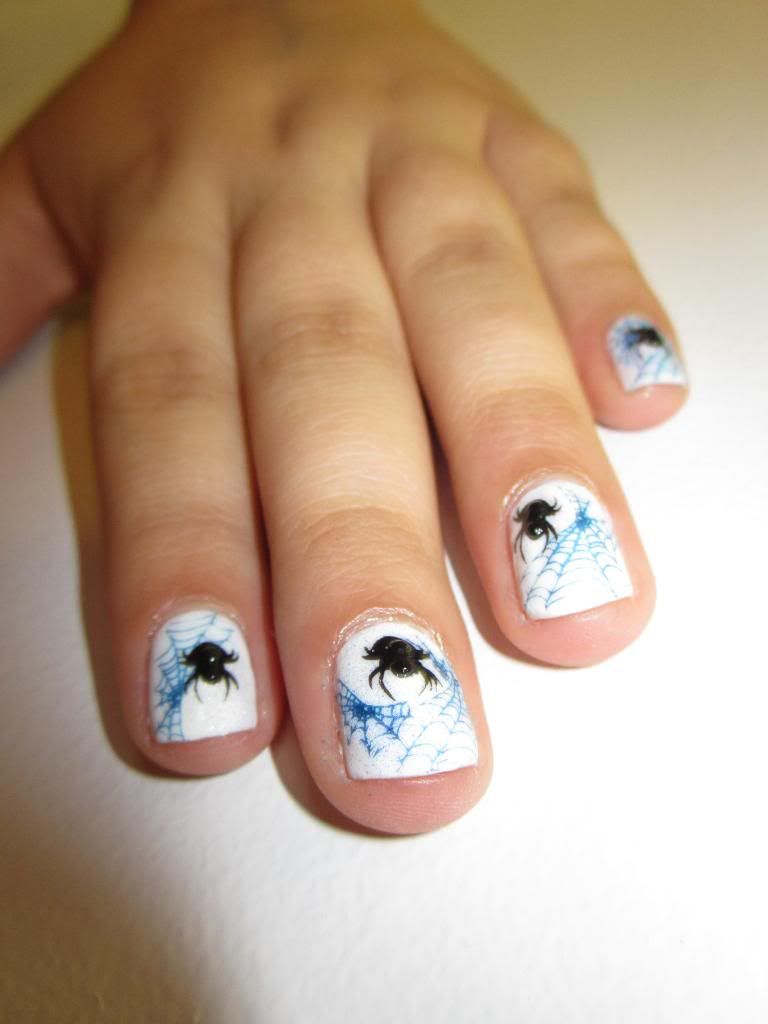
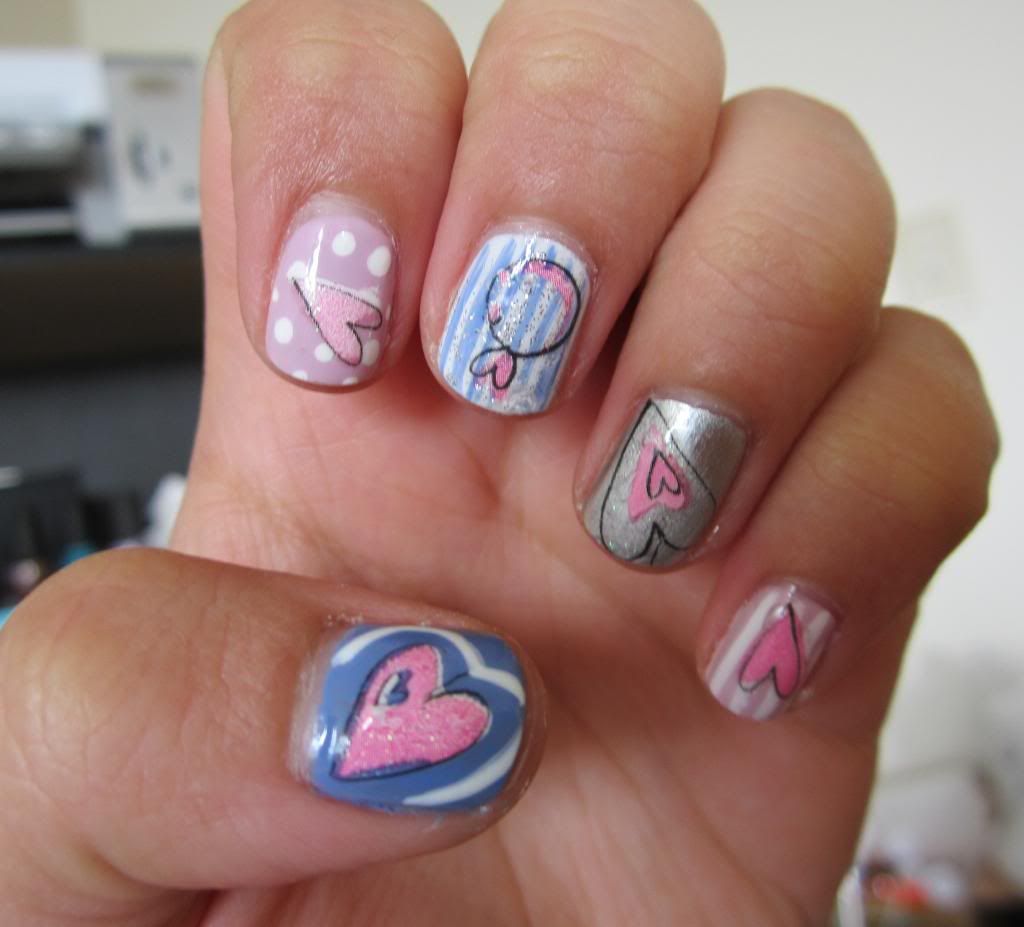
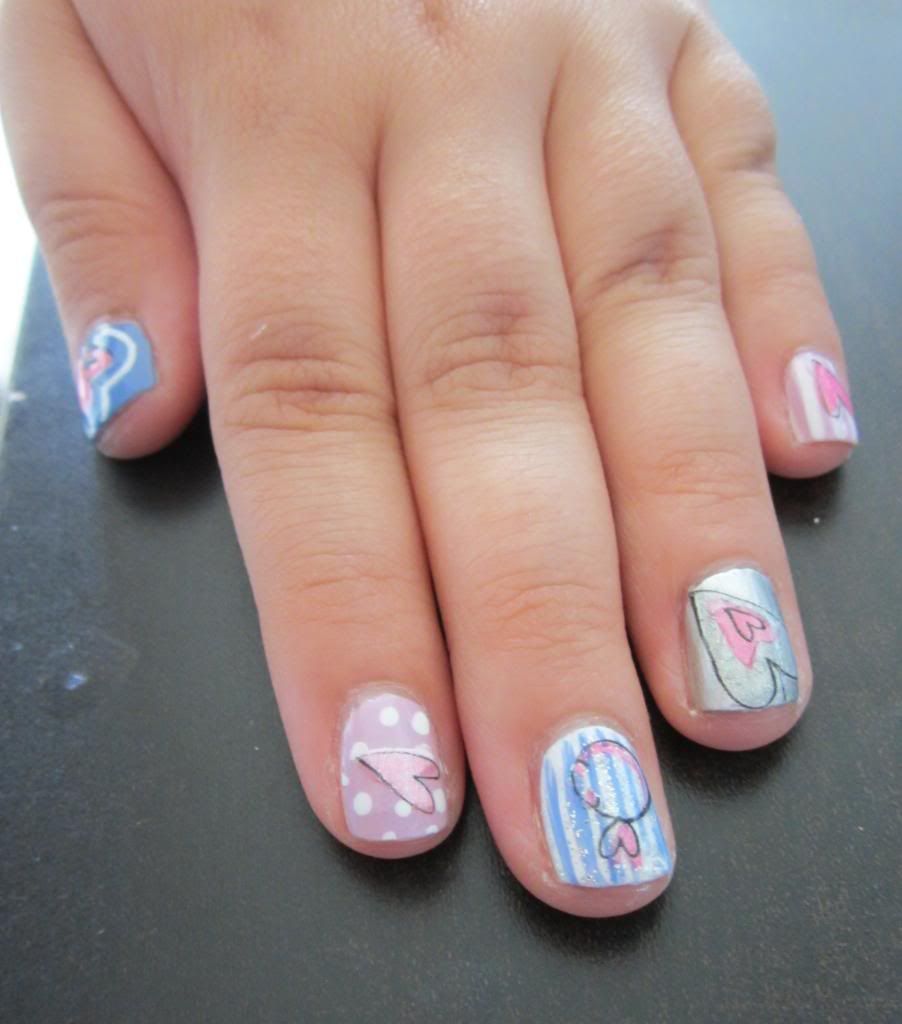
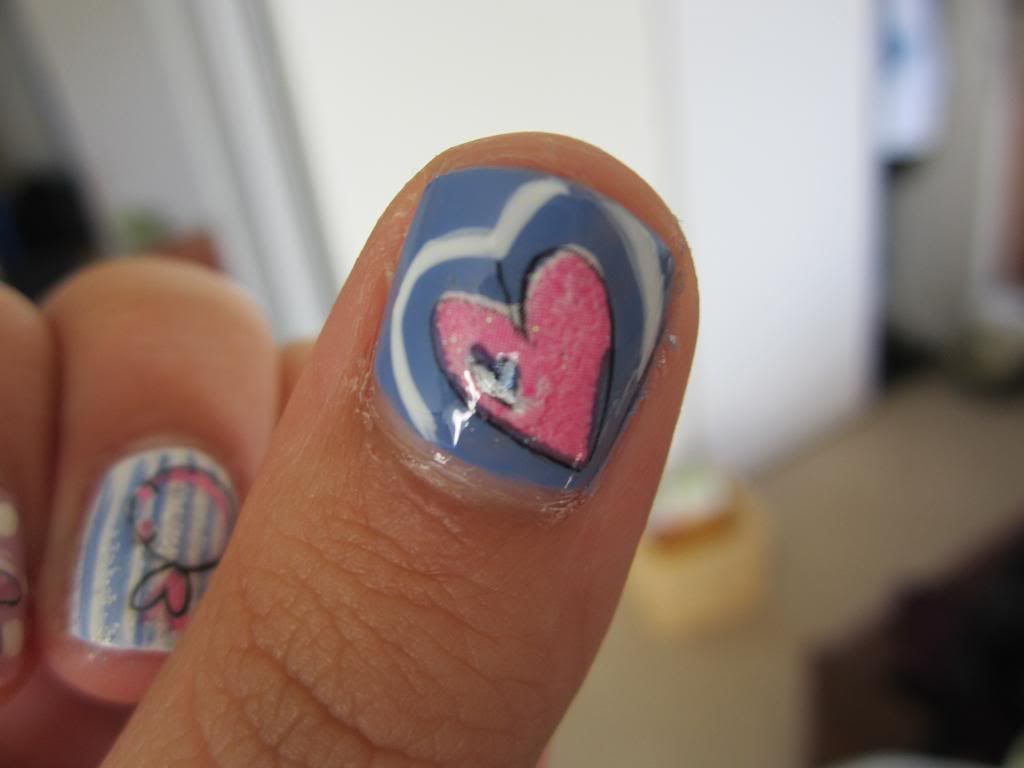
My favorite hand is the right hand. I didn't like the blue thumb in combination with the rest, I would have put the Starry Pink on the thumb instead. I loved the thumb, and I think that would make a good manicure on its own, but not so much with the others.


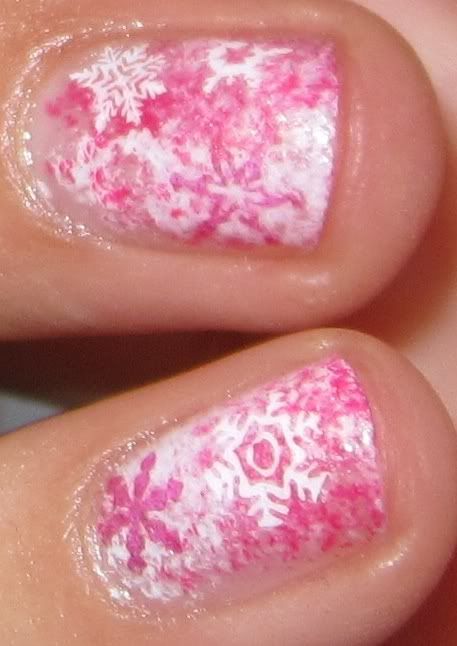
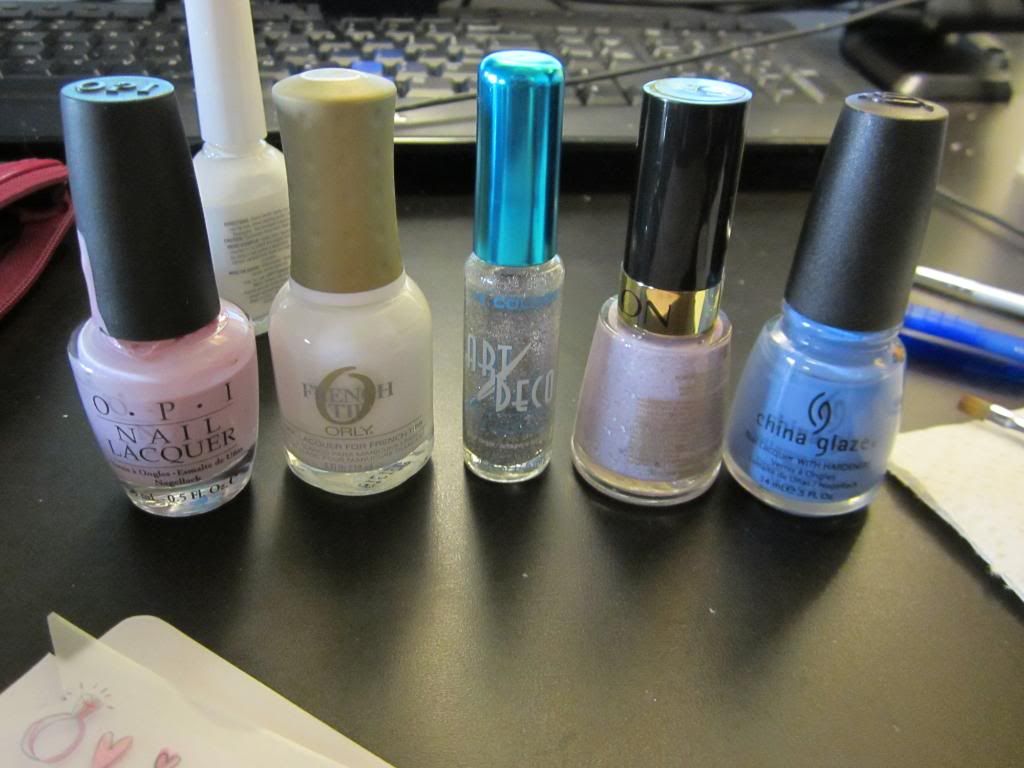
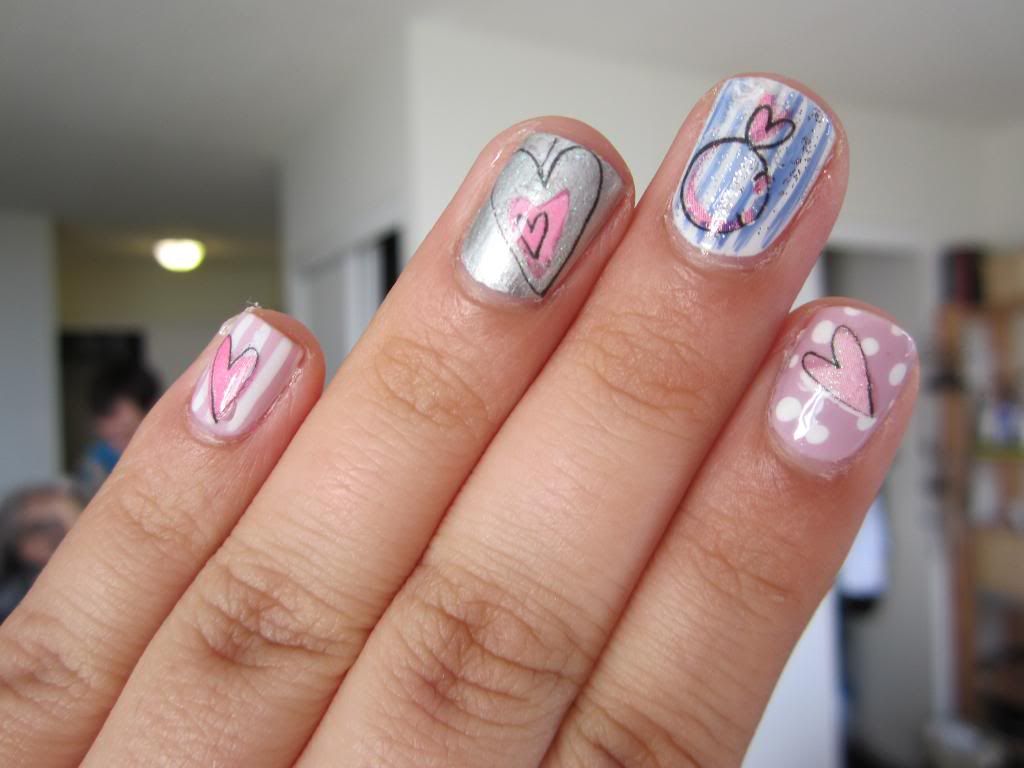
These are the colors I used, but I forgot the silver in the picture. The silver was Sally Hansen Insta-Dry Silver Sweep, then OPI Panda-monium Pink, Orly French Tip, Art Deco silver glitter striper, Revlon Starry Pink, and China Glaze Peri-Wink-Le. The transfers can be seen in my Dollarama post before this one.
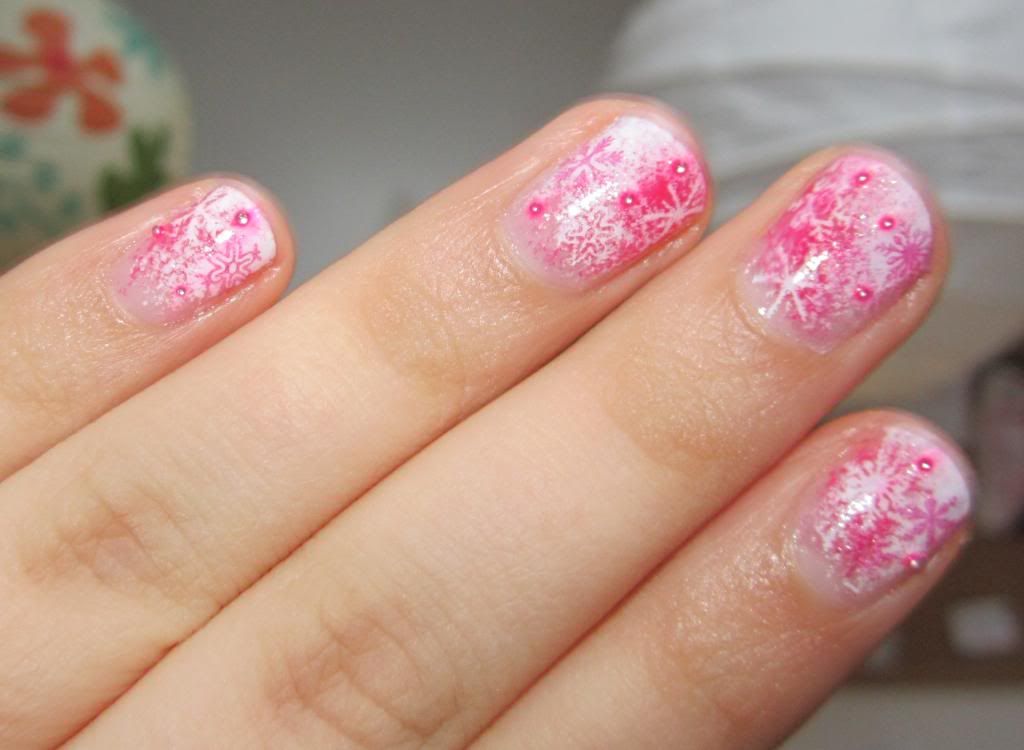
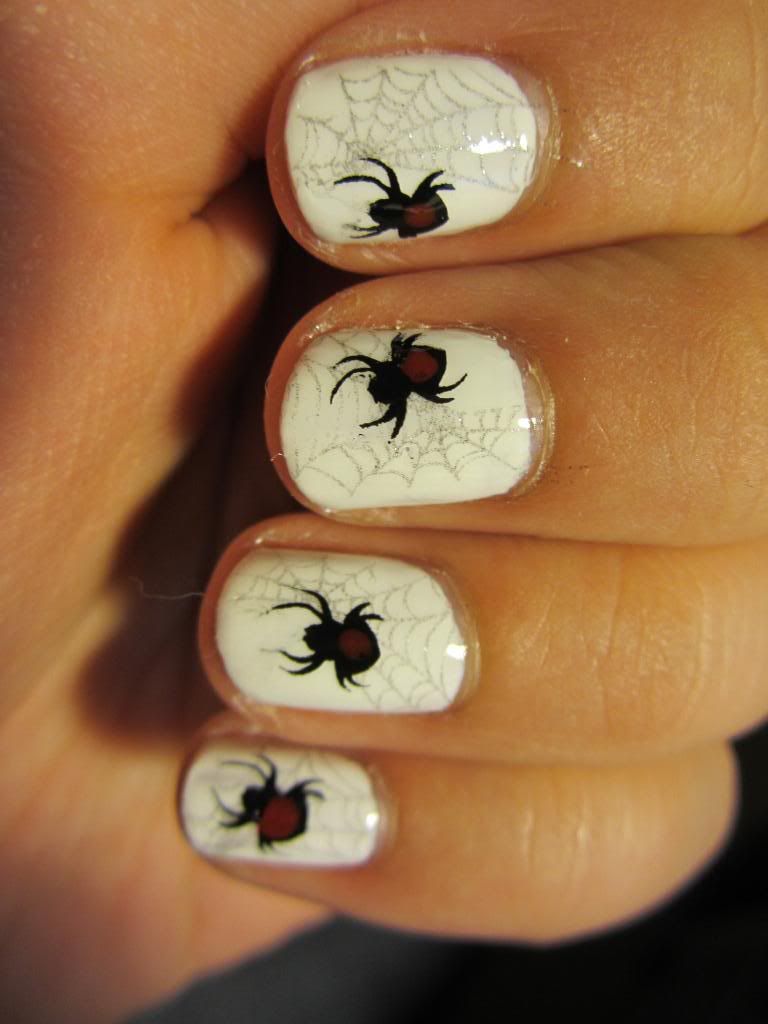
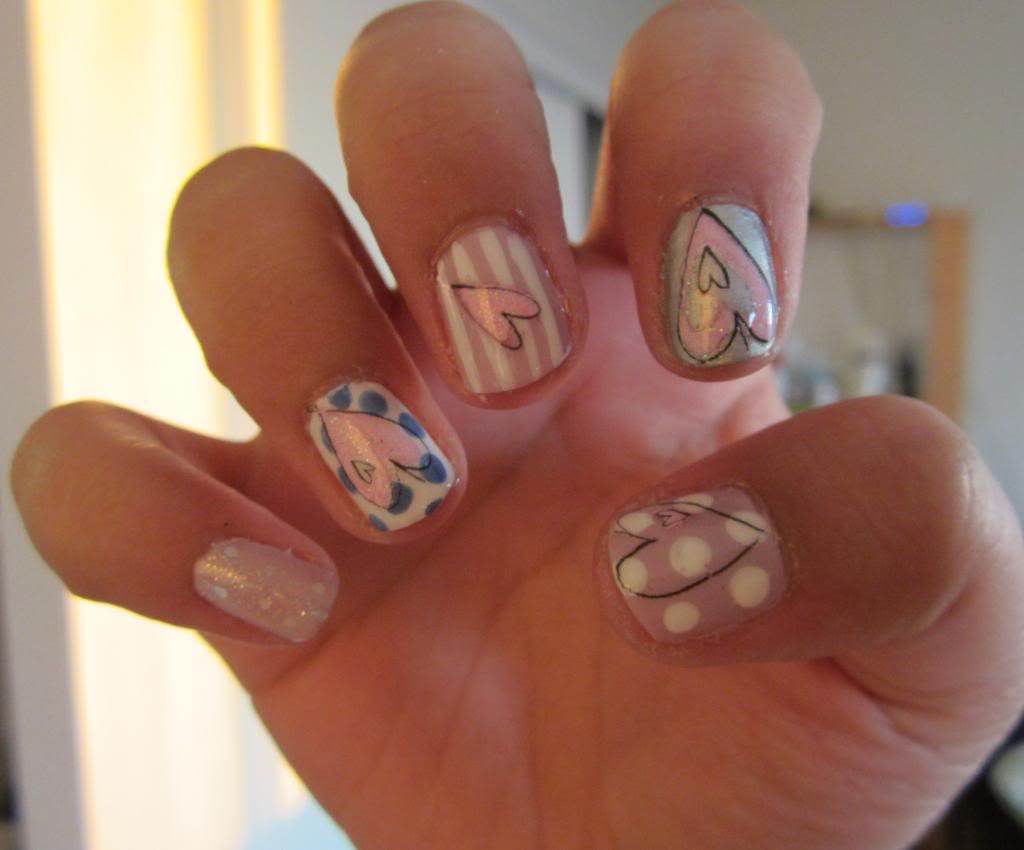

Left hand up close:


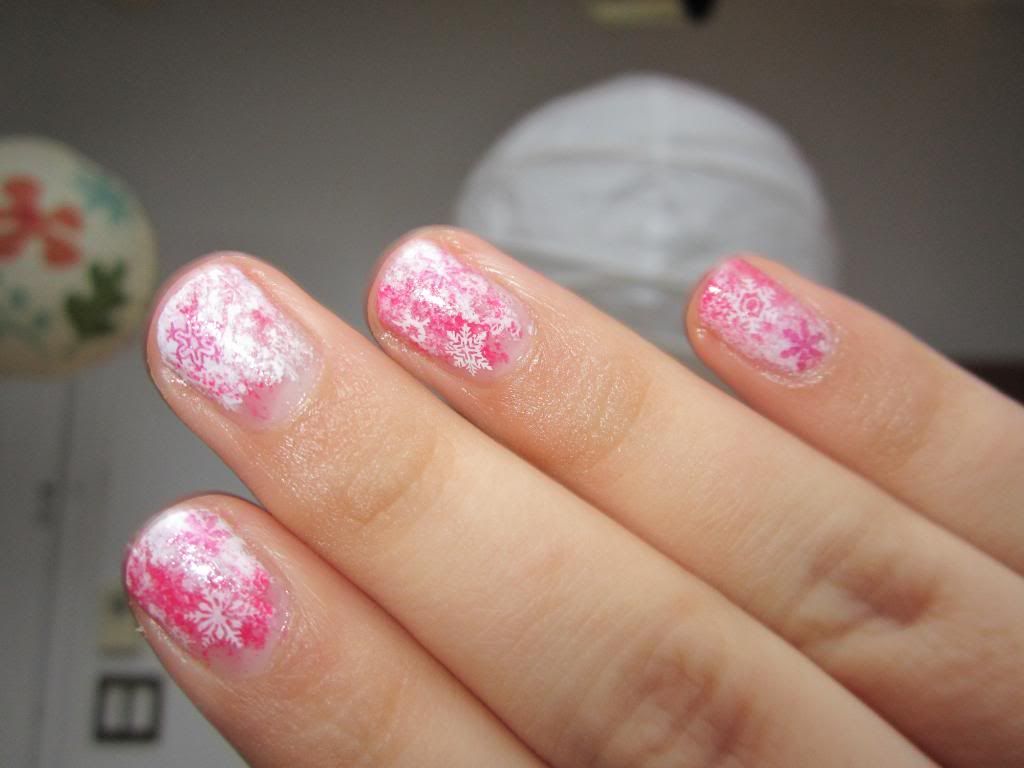
You can see I smudged my middle finger, I definitely jumped the gun several times and smudged.
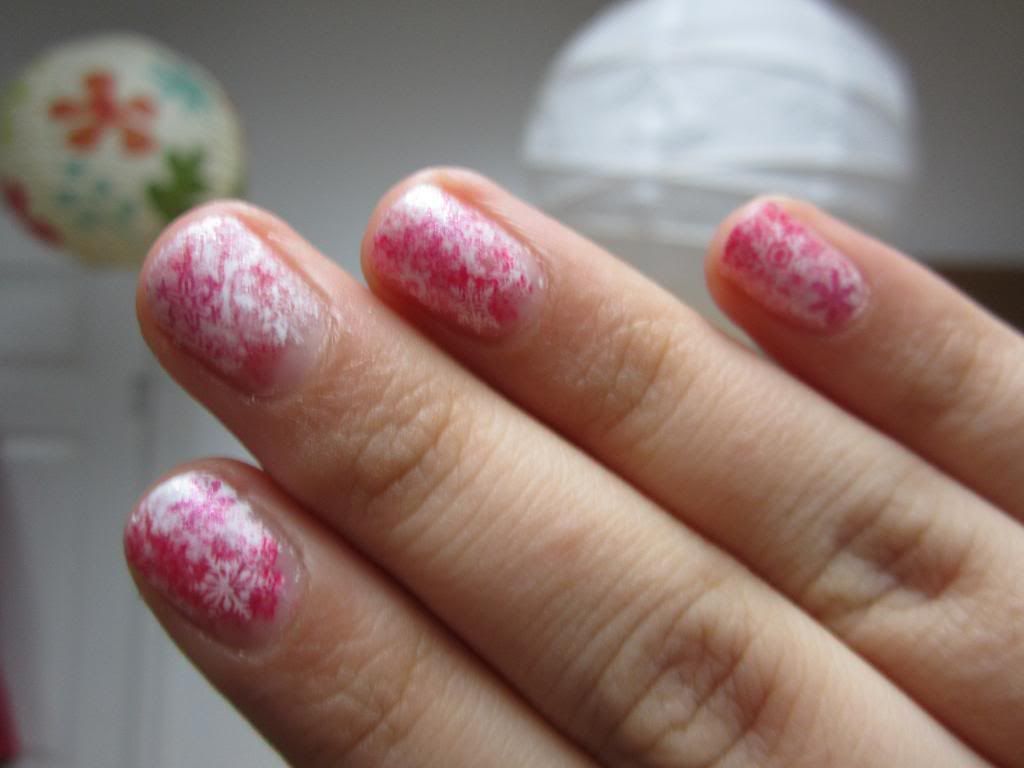
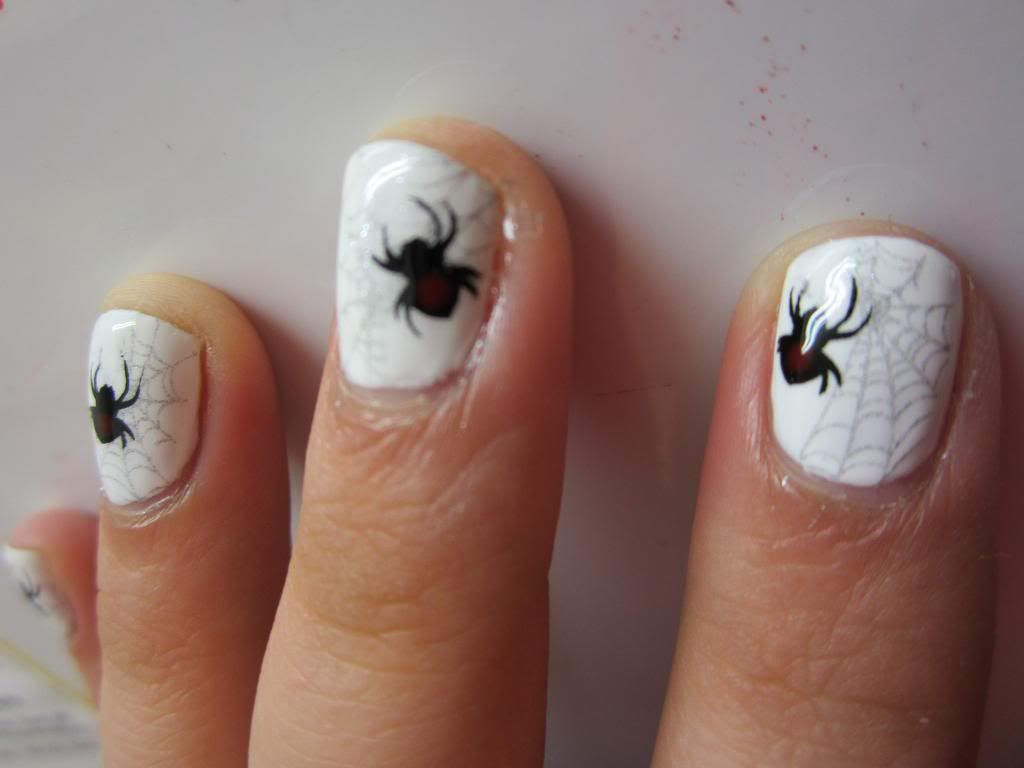
This is a close up of the thumb, which I really loved:


Right hand up close:


It was really hard to get the colors right in photographing it, but it was so pretty. Definitely try it out if you can, these colors together are great. 
Related Posts Plugin for WordPress, Blogger...